I create a lot of audio content between my day job and the many projects I work on. Most of that audio is narration and sometimes I’m recording my screen at the same time and other times I’m reading from a script.
When I started out recording audio I didn’t do it very often and I also didn’t have any equipment for doing it. It was up to my recording sounding good on the regular microphone and what not that came with my computer. Not very good sounding especially when you’re bad at recording narrations to begin with such as I am.
In 2014, I began working on a course for Udemy about creating a personal brand website with WordPress. I wanted something a bit nicer than the default microphone so at that time I bought a Blue Snowball microphone (I had the chrome version). It was retro looking and cool with a slight improvement on no mic at all. I hung onto that microphone up until last year (2020) when I thought it was time for a real upgrade.
My business had several projects come in at the beginning of the COVID-19 pandemic which gave me a pretty good windfall of money. So, I decided I was going to use some of that money to make some much-needed work improvements. That also included improving my work desk which is still my favorite purchase.
One of those purchases was some awesome new equipment for recording audio. I’ll start by saying my audio has never sounded better and I’ve never needed to do so little editing to it.
I did a ton of research to find the best audio recording equipment without spending all of my money. I didn’t want the cheapest stuff but I wanted really nice stuff for a reasonable price. I’m not sure if you’d consider my equipement high end or mid end but it’s definitely not low end anymore.
Here’s what I ended up purchasing for my little recording studio, so I can do stand-alone narrations and also video recordings with great audio.
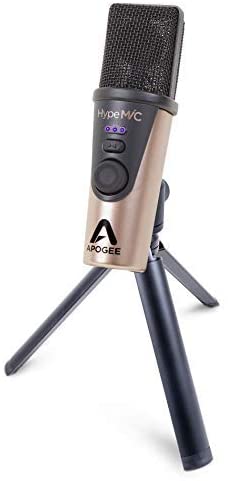
- Apogee Hype Mic
- RODE Swivel Mount
- Auray Premium Reflection Filter

Each one has a specific use and I don’t always use them all together for reasons I’ll get into in a bit.
Apogee Hype Mic

It’s a simple mic meant for podcasting therefore it’s small and portable. It came with a case that has a place in it for the microphone, stand, and the connector along with a pocket on the opposite side where you can stuff the cable and pop filter. It came with three cables so you can use it with USB 3.0, USC-C, and even lightning connector.
It’s pretty cool that I could use the microphone on the run but I’m never on the run, so I don’t. I use the two USB cables depending on the job I’m doing. Sometimes I record audio directly into Camtasia on my work computer which only has USB 3.0. Other times I record directly into my laptop which is only USB-C (MacBook Pro).
Either way, the cord it comes with is sort of short so it didn’t reach with the swivel arm I use. I can run the cable a straight shot from the mic to my computer without routing down the arm but that’s kind of messy and ripe for an accident. I bought a USB-C extension cable that I ran along the arm so that one is covered. I don’t have a USB 3.0 extension, though, so I still have to run that cable straight from the mic to the computer. I rarely use the old-school USB, though so it’s not a big deal.
My most common setup is recording to my MacBook Pro because I have Adobe Audition on it and also the newest version of Camtasia (2020) as opposed to my work version which is only 2018. When I record for work I’m usually doing an Instructional Design project which I typically have a script for. That’s when I use Audition and record with the filter also.
Recording is easy. To prepare the mic I plug it in, push the wheel button one time until I have one purple (the other settings make my voice sound goofy(er)) light and then turn the wheel and test my talking so it records at a good level. That’s all I have to do and my recordings sound amazing. It’s a long shot from the Blue Snowball which I had to mess around with a lot once the recording was done.
Now for the swivel arm.
RODE Swivel Mount
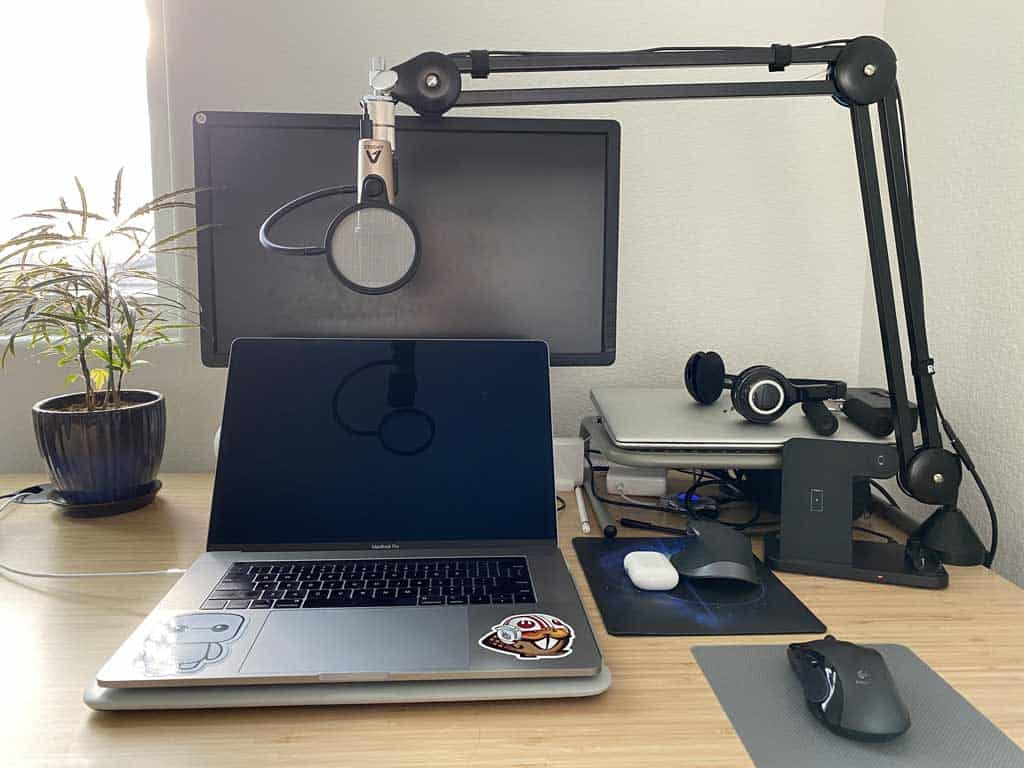
This thing is pretty awesome. It has a clamp, so I mount it directly on my desk and keep it out of my way most of the time. I ran the USB-C cable and extension with the provided Velcro strips so it’s very versatile and easy to move to exactly where I need it.
The only part I’m missing is a shock mount which is only occassionally a problem. Sometimes the arm will make a bit of a noise and create some mic noise. I suspect this isn’t a big deal, though, because a shock mount isn’t going to prevent that type of noise anyway, only the bumps which I’m pretty good at preventing.
I had an issue with the filter, so I have a specific way of using it which I’ll get into in that section.
Ready for that?
Auray Premium Reflection Filter
The reflection filter is pretty awesome for those setups where you can’t take up tons of room but want a good recording. I tried hooking this thing up to my swivel arm but it’s so heavy it pulls the arm down to the desk. It definitely doens’t work well on a swivel arm.
My solution?
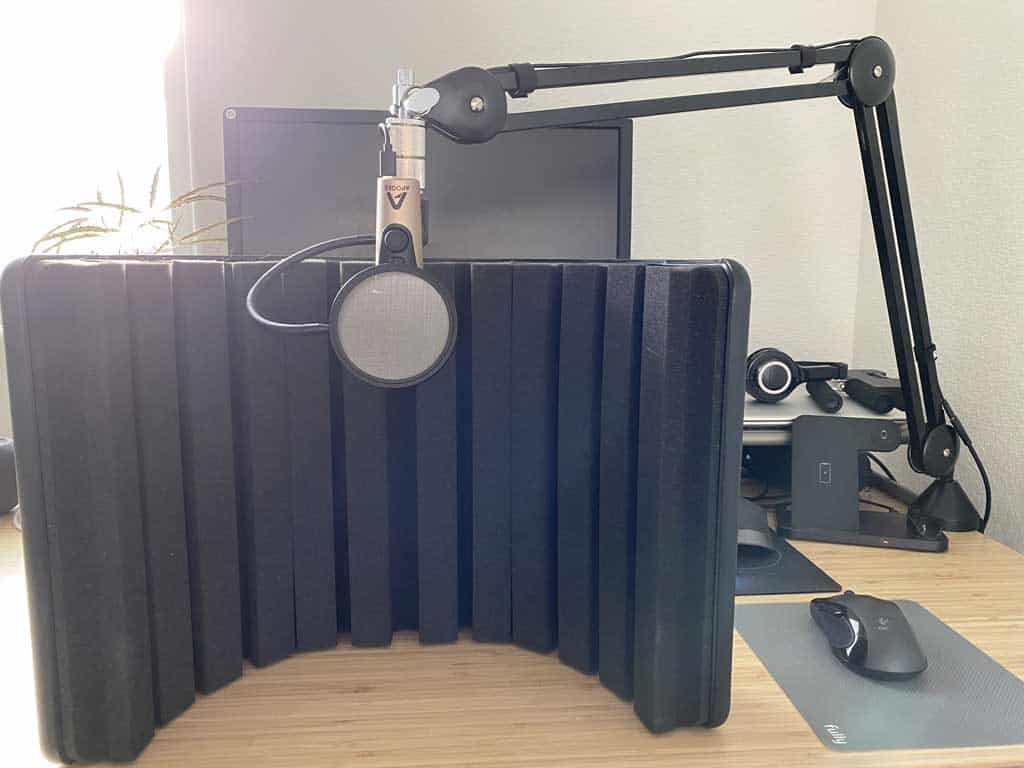
I just keep the filter off the arm and in the closet most of the time. I use the filter only when I record narrations for courses and videos which have a script. That way I can set the filter on my desk, pull the mic on the swivel arm into the filter and record away. It works well.
Here’s how that looks.

You can see the first picture I showed (way up in this post) the microphone is sitting above my laptop. I use that configuration when I’m recording tutorial videos and such because I need full functionality of my computer. Those are videos like those I record for my WPHubSite video tutorials.
The one just above doesn’t give me good access to my laptop. The filter sits in front of it and I pull the mic down into the filter. A word from the experienced, though, don’t keep water or tea next to this setup when recording. I made that mistake and since it’s hard to start and stop recording (I have to reach around the filter) I knocked an entire tea over all over my desk. It was a huge mess.
I love the filter and it does help but it’s huge and bulky for my reasonably sized desk. I just stick it in the closet when I’m not using it.
Recording In Luxury
Things have come a long way since I was recording with the default mic from my computer and then the somewhat better Blue Snowball. Now I’m rocking a semi-professional microphone for recording narrations for courses, videos, and tutorial videos that I create without planning. They all turn out really well now that I have a fancy mic that does well in a non-professional recording environment.
I have no recording booth, I don’t want to go into the closet, and I don’t want to have to do major post-recording editing. Now I can plug in my mic, check the settings, and be off recording some awesome sounding audio without issue. All of this even in my office with absolutely no filters on the wall. The mic seems to do a great job without the filter though the filter does help a little.
My recorded audio used to sound tinny and have an echo, that’s not the case anymore.
If you have some money to invest in a good mic for voice over then this one works extremely well. I end up doing a lot less editing the audio because the mic sounds so good raw. Did I also mention it would be a great mic for podcasting? It would especially if you want a great mic and travel a lot (once things are back to normal).
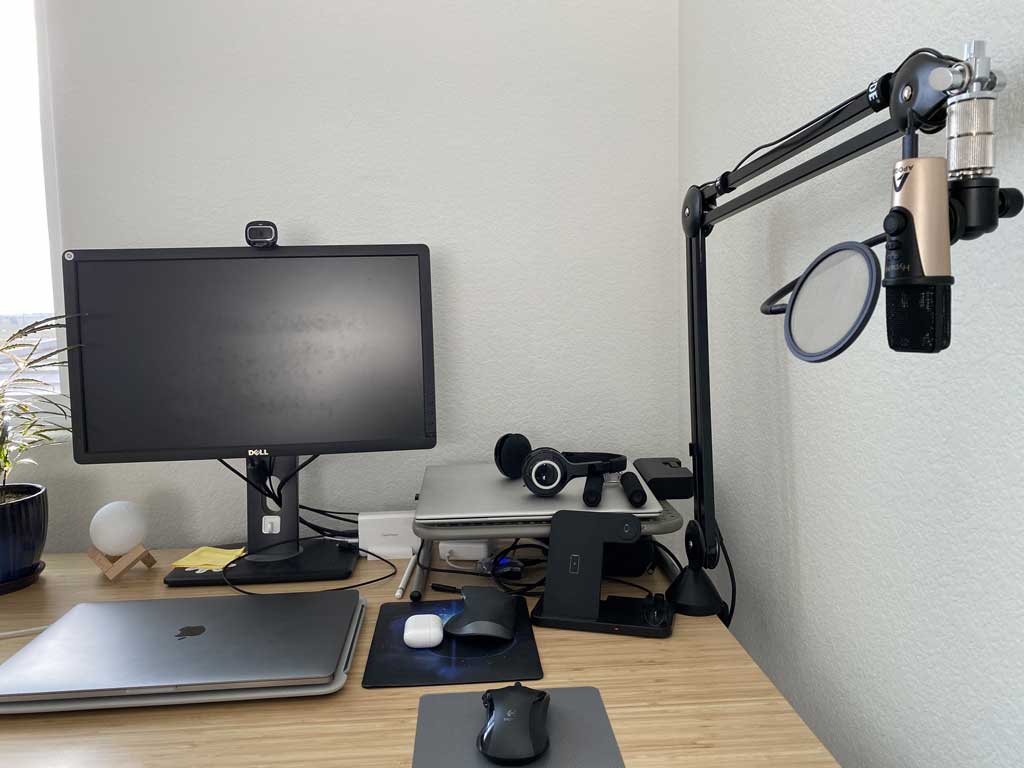
The best part is that I can push the mic out of the way on the swivel arm which makes it easy to get it out of the way and then pull it back where I need it without any shuffling on my desk.

That’s my desk with it pushed out of the way. That’s its normal position which is great because I don’t like to mess around with a lot of stuff. I can reach over, pull it into place, plug it in and I’m ready to go. The USB-C extension cable sits under my work laptop coiled up ready to plug into my laptop.
Here are the two types of projects I use my mic for:
- Recording live video tutorials of software and websites with Camtasia.
- Recording audio in Adobe Audition from a script for Instructional Design projects and marketing-type videos. I just run a noise removal process and normalization on the audio and it’s good to go.
It’s a pretty sleek setup and I enjoy having the simplicity of it all and how it keeps my desk nice, open, and clean (and more importantly, uncluttered). The thing is, I thought my recording setup was pretty decent until I got this setup. I’m always hesitant to answer people’s questions about my favorite XYZ item because honestly, you never know how yours is unless you’ve experienced something else. I thought I was doing pretty well but now I know it can get so much better.
What’s your recording setup?